custom, razor, renovation, shaving

HG Razors

Podziwiam rzemieślników, którzy są jednocześnie fachowcami i pasjonatami. Swoją pracą jakby zaprzeczali, że jesteśmy skazani na masowość i nijakości produktów w naszym otoczeniu. Cóż z tego, że taki nowoczesny produkt jest napakowany elektroniką, skoro jego główna funkcja szwankuje a on sam funkcjonuje krótko. Teraz mamy żelazka z minikamerą (logo AI) wykrywającą rodzaj materiału i lodówki typu internet-of-things, w których kruszą się plastiki po schłodzeniu. Degradacja! Dlatego produkt ręcznie zrobiony tak dużo znaczy. Wraca mantra, że piękne jest to co się ładnie starzeje, a nie co się błyszczy na reklamie. Dobra brzytwa posłuży synom i wnukom. W związku z tym można się rozgrzeszyć z wyższego kosztu, nieprawdaż?

Kiedyś na Badger & Blade robiliśmy listę współczesnych makerów brzytew. Było tam ponad 100 pozycji. Niestety, ta lista chyba zniknęła. Zapoznałem się ze wszystkimi wytwórcami z tej listy. Wiele z przejrzanych projektów nie godziło się z moim gustem. Rozumiem, że makerzy sięgają bo odlotowe projekty (typu “smok”, “toporek” itp.) by uniknąć powielania modeli tradycyjnych oraz by dać upust fantazji swojej i klientów. I bardzo dobrze! A z gustami się nie dyskutuje. Jednak osobiście nie jestem w stanie zaakceptować wszelkich agresywnych dziobów, kolcy i zadziorów. Proste i oszczędne projekty wydają się bardziej szlachetne. Stąd myślę taka popularność pewnego projektu Rafała Lewandowskiego i modeli robionych przez Sebastiana Cichomskiego. Maker dodaje swój własny smaczek brzytwie, może być subtelny, ale wystarczający by do sprawdzonej klasyki dodać smaku i charakteru. Konserwa, tak jest. Jeśli taki projekt jest wykonany profesjonalnie, pieczołowicie ze zrozumieniem walorów użytkowych, otrzymujemy brzytwę na dekady, jeśli nie dłużej.

Obserwuje prace Gergely Horváth pod marką HG Razors od dłuższego czasu. Zdaje się, że moje próby zwymiarowania różnych wersji projektu Saito, pomogły HG w wykonaniu jego wersji SK2. Ponieważ zbieram różne wykonania modeli Saito, przyjrzałem się dokładniej pracom HG. Było warto. Najbardziej uderzająca była dbałość o szczegóły. To widać zarówno na ostrzu, jak i w wykonaniu okładek oraz oplotów do kamisori. Dopiero później mogłem zobaczyć co nieco z warsztatu. Wykonywanie logo grawerem to wyjątkowe podejście.

Nie wszystkie projekty HG budzą mój zachwyt. Jak pisałem, to kwestia gustu. Ale nawet te “dziobate” są na tyle intrygujące, a jednocześnie wykonane wzorcowo, że warto się nimi zainteresować. Ta obok, mimo wątpliwości co do walorów praktycznych, jest “warta grzechu”. Nie ma też co szukać u HG bardziej skomplikowanych wykończeń powierzchi (nie myląc z damastem), czy to ornamentów, czy tak lubianych surowych nacięć i trawień.

Brzytwę można kupić gotową, albo uczestniczyć w projekcie, przynajmniej podpowiadając wykonawcy swoje decyzje. Taka możliwość nie jest oczywista, bo klient potrafi być paskudny. Tak, czy inaczej skoro sięgamy po custom, i płacimy za custom, a współpraca wychodzi obu stronom na korzyść, warto uczestniczyć w realizacji. HG daje tę możliwość. Pozwala na ingerencje, nawet na poprawki (w moim wypadku zmieniliśmy piny). To jest zabawa. Przy tym wszystkim, HG daje gwarancję na zwrot brzytwy w przypadku niezadowolenia klienta.

Do realizacji zakwalikował się model dość tradycyjny, z lekkim uśmiechem, w wymiarze 9/8 (w wypadku uśmiechu i taperowania, ten wymiar nie straszy), 73 mm tnącego w szlifie 1/4. Klin i piny (pivot w wersji na śrubkę) z brązie fosforowym. Okładki cocobolo bez podklejki. Dłuższa historia była z doborem materiału. Niedostępność na rynku stali C125SC o mało nie skończyła się porzuceniem projektu. Na szczęście udało się wygrzebać starą formatkę ze “śmieci”. Zapewne przy wykonaniu na C105 poszlibyśmy w wykończenie satynowe. Hartowanie dało twardość między 61 a 62 HRC. Brzytwa przyjechała bez dedykowanego pudełka, ale… z śrubokrętem do pivota. Brzytwa w użyciu sprawdza się wyśmienicie. Wpada w piątkę moich najlepszych.

Poniżej, za zgodą HG, umieszczam kilka zdjęć z procesu wykonania. Różne ciekawostki można zauważyć.

lessons learned, razor, renovation, shaving

式2i3: Renowacja i drobne sztuczki


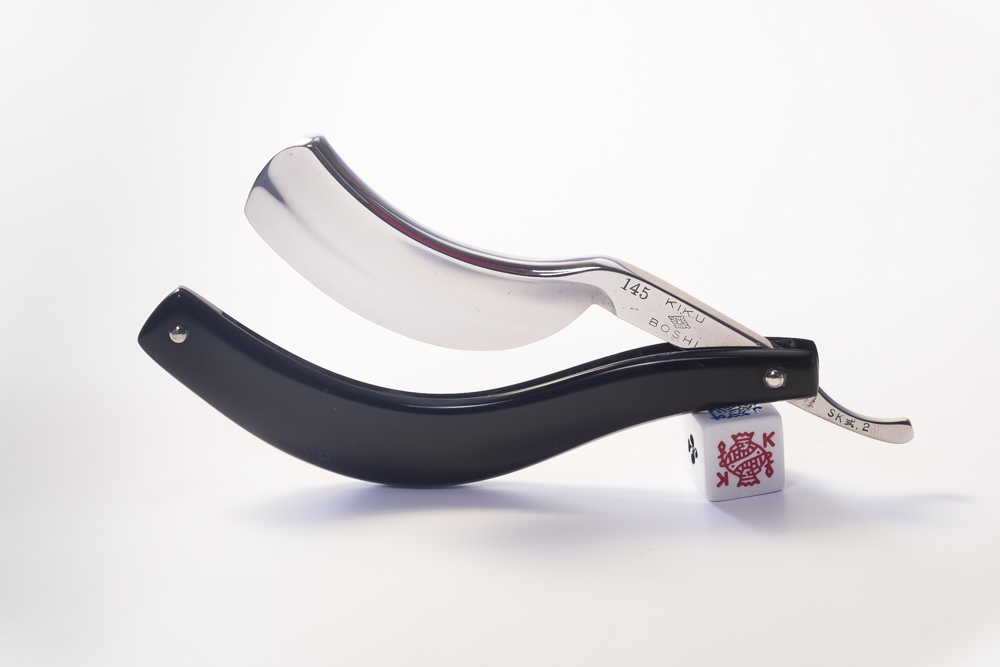
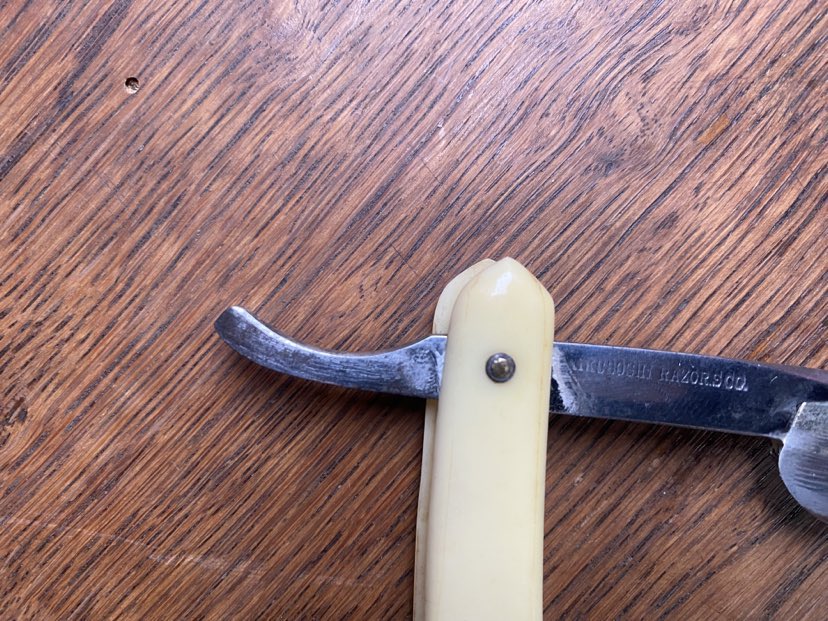
Kikuboshi 145 i KRG Saito SK3

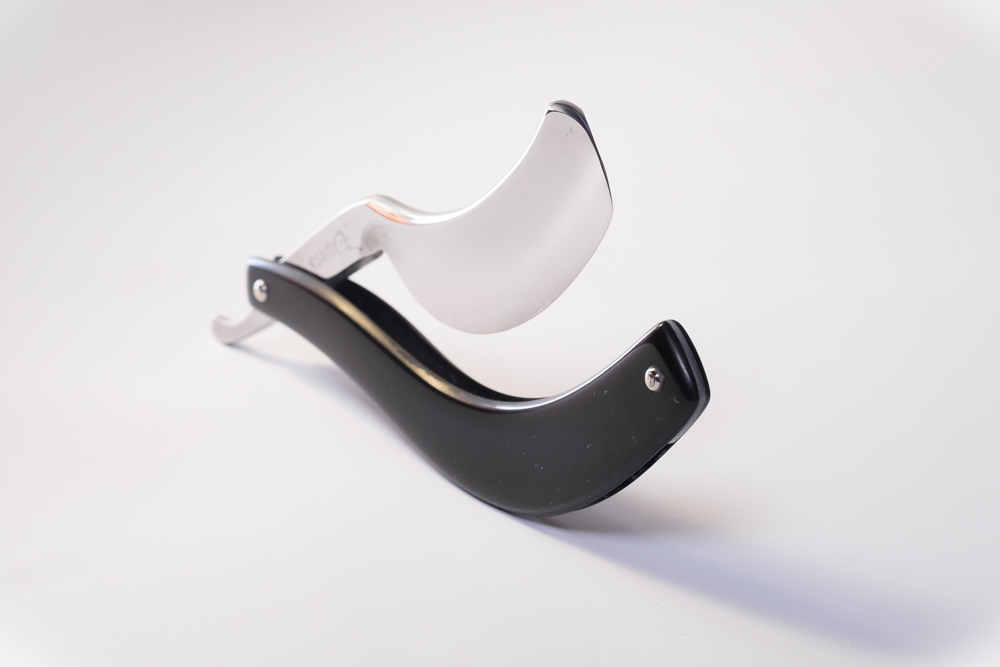
Niby wszystkie wersje zaprojektował ten sam Ryuichi Saito 斎藤隆. Nie mniej każda, choć brandowane pod różnymi markami Ribbon Co, była wykonana w odmiennej formie. Zmiany uwidaczniają się nie tyle w samej puncy, co w zastosowanych materiałach, profilu i szlifie. W związku z tym, są to inne brzytwy. Szny ten sam, rozpoznawalny z daleka. Ale inne golenie. W tym wpisie pokazuje dwie cenione sztuki z rodziny SK. Z ich trzech wersji, to SK2 osobiście najbardziej mi pasuje, a ze wszystkich wersji SK2 to właśnie realizacje Kikuboshi wydają mi się najlepsze w użyciu. Stąd jedną z brzytew dziś jest właśnie Kikuboshi 145 (aka SK2). Druga to najczęściej spotykana wersja, czyli SK3 w typowym oznaczeniu w postaci puncy z inicjałami projektanta RS i tajemniczym oznaczeniem KRG (chyba nikt nie doszedł co ona oznacza). Wyjątkową czyni ją okładka z oryginalnym metalowym logo RS wtopionym w okładki. Jest to wersja rzadko spotykana na rynku.

Tyle o samych brzytwach. Dołączają do kolekcji. W tym wpisie chciałem przedstawić kilka trików stosowanych w czasie renowacji. Każdy znajduje swoje sposoby na trudności, które napotyka przy renowacji. Warto się podzielić na konkretnym przykładzie.

(nie)Trick nr 1

Renowacja jest przede wszystkim próbą cierpliwości. Podziwiam niektórych mistrzów renowacji, bo ich kunszt, oprócz wiedzy, świadczy o anielskiej cierpliwości. Mnie często jej brakuje. Normalnym jest pokusa pójścia na skróty. Sam niejednokrotnie dostawałem dobre rady wskazujące elektronarzędzia, głównie typu końcówek do Dremela. Niestety, uważam że nie ma drogi na skróty. Żadne roztwory, ani dyski szlifierskie nie nadają się do tak delikatnej pracy. Zrobią więcej szkody niż pożytku. Użycie tych narzędzi to nie trick, tylko kosztowna droga na skróty.

Trick nr 1

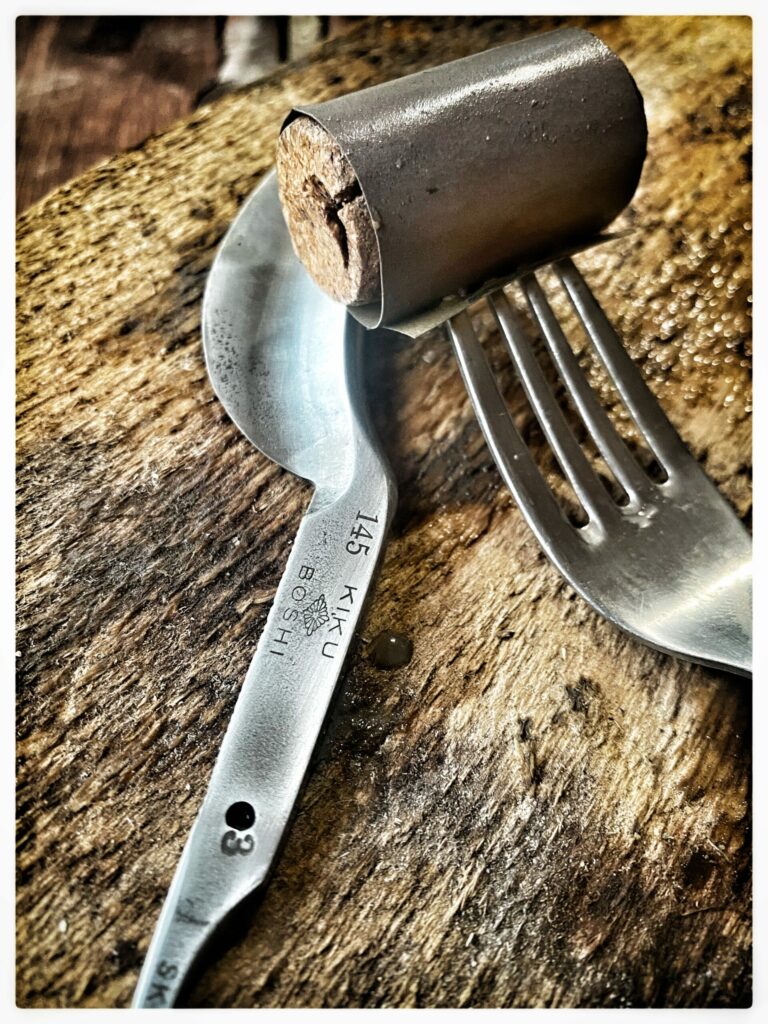
W związku z powyższym konieczne jest zbieranie wklęsłości szlifu kolejnymi gradacjami papieru (500, 600, 800, 1000, 1200, 1500, 2000 w moim przypadku). Materiały miękkie (typu tkaniny ścierne) nie nadają się, bo w gruncie rzeczy chodzi o zrównanie “dołków” i “górek” na remontowanej powierzchni. Najlepiej by materiał ścierny pracował na jak najszerszej powierzchni. Miejscowe wybieranie materiału może wręcz zmienić geometrię ostrza. Dość popularnym jest użycie korka ze względu na równowagę sztywności i elastyczności, oraz profil. Mój osobisty trick polega na …. użyciu widelca. Tak właśnie. Kto próbował pracować korkiem od razu wie ja niefajnie ściska się taki mały przedmiot kilka godzin. Widelec wyśmienicie poprawia uchwyt, manewrowość i nie męczy ręki.

Zwróćcie uwagę na tajemniczą cyfrę 3 przy pivocie

Trick nr 2

Starowinki mają to do siebie, że najczęściej wżery pojawiają się w najgłębszym miejscu szlifu przy czubku ostrza. Bywa, że brzytwa wygląda na NOS, a na nosie ma tak głęboki wżer, że i tak trzeba całą szlifować dogłębnie. Jak wspomniane wyżej, miękkie i wąskie tarcze się nie sprawdzają. Ale sprawdzają się twarde kamienie. Pokazane na zdjęciu paluszki, podpatrzone u jednego z naszych producentów, ścierne są bardzo pomocne. Można dobrać potrzebne gradacje. Przed wszystkim trzymanie takiego paluszka jest wygodne i bezpieczne. Wystarczy odpowiednio zaokrąglić jego końcówkę. Niektórzy stosuje zestaw kamieni naturalnych tzw. paluszków jnat, dokładnie w tym samym celu. Wybranie uszczerbków w ten sposób przyspiesza pracę z papierem ściernym. Ten etap zawsze jest niezbędny.

Trick nr 3

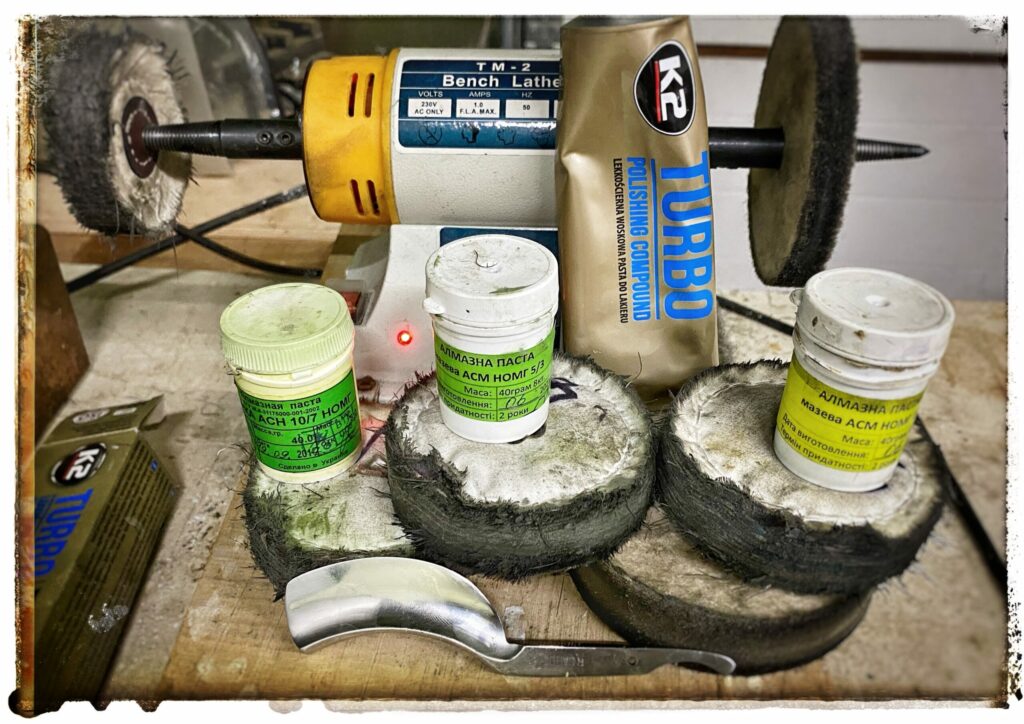
To nie trick, ale też chyba nie lenistwo. Wygląda na to, że w polerowaniu także trzeba robić progresję. Po papierze 2000 wciąż zostają wyraźne ślady. Nawet jeśli celuje się w wykończenie satynowe, a nie lustro, wyraźne rysy są jakby zgrzytem. Dlatego najpierw stosuje pasty diamentowe o różnej gradacji, sukcesywnie przechodząc na pasty polerskie i nabłyszczające. Przy takiej ilości przejść wydaje mi się wskazane użycie elektrycznej polerki i różnych tarcz filcowych i materiałowych. Na końcu nie objedzie się bez polerowania ręcznego.

Trick nr 4

Co jest najtrudniejsze i irytujące w renowacji. Dla mnie, są te małe wkurzające podkładki, które nie chcą w dodatku przechodzić przez mocno spasowane pręty do nitowania. To wszystko w układzie 3D, z tendencją to spadania. Dlatego zaklepuję jedną stronę przed osadzeniem w okładkach. Następnie mocuje nit w szczelinie samozaciskowej płyty roboczej (zwykłej, ale super twardej deski). Sprawdzi mi się to podejście wyśmienicie. Ten sam samozaciskający otwór sprawdza się przy wyrabianiu klina.

Inna bardzo częsta wada brzytew to brak centryczności. Wtedy brzytwa zahacza za okładki. Pomijam niezrozumienie jak działa klin i błędy z tym związane oraz problem “żyjących” okładek rogowych. Chodzi mi raczej o typowy brak centryczności otworów na nity, który kończy się skrzywieniem nita. Efekt użytkowy jest taki sam – ostrze haczy o okładki. Wywiercenie centrycznego otworu prostopadle do okładek jest sprawą jasną. Trick (nie trick) polega na próbnym skręcaniu brzytwy śrubkami o identycznej średnicy co nit. Pomijanie tego etapu kosztuje.

Trick nr 5


Myślę, że panowie, którzy mają nieporównywalnie więcej doświadczenia ode mnie mogliby tu wiele dodać. Wszystkie prace związane z renowacją wspomnianych na początku SK2 i SK3 są dostępne na playliście YT

Na koniec przedstawiam ostrzenie SK3. Bardziej spektakularnie byłoby pokazać SK2. Nie mniej nawet na tym przykładzie widać mniej więcej o co chodzi w ostrzeniu brzytwy z uśmiechem. Nie ma na wideo jakiegoś własnego tricku. Choć muszę przyznać, że podobnie jak w garncarstwie, najlepiej pracuje się na stojąco, blisko wody.

razor, renovation, restauration, shaving

Saito Kikuboshi SK2 and family

Finally I’ve got all of them. New SK2 arrived. Seems to be in very good condition. But before I can make nice photos, present them and then try in practice, it deserves some refreshing. I promise to do so and then comment. I hope that there will be no change in the overall conclusions comparing to what was reported in the other post on SK1. In fact, SK2 is close to SK1. A bit larger with more moderated curve. But the type is almost the same. It may be that this is a good compromise and balance between SK1 and SK3 which are on extreme sites.

This gives the possibility to compare all tree Saitos. See the below picture. There are photos of all 3 Saitos, in the same scale, put into the axis of the pivot whole. I hope to publish here the exact dimensions, including curvatures.

All 3 SKs overlayed in proportions

I decided to take some measurements of the geometries. In fact I have seen some custom-made razors, polish and japanese, which follow the original SKs but the difference is always appealing. So, what makes the difference?

Below, you can see SK1 and SK2 measurements. They might be not exact, as they have been taken from already used guys. Let’s also remember that SKs were made by different makers. I would point out that SK2 is more than 1 cm longer in blade itself. While the radius of the curve of the edge is more than 1.3 cm higher. This is a significant difference. But I believe that what is the most decisive is the dislocation of radius for internal and external (top and bottom) curves. In both SKs they are neither horizontally nor vertically aligned. It makes tremendous difference on the geometry of the hollow. Both are extra hollow with belly so the hollow belly line must be again dislocated (not symmetric) from upper and bottom edge. This must be hard for making!

saito SK1 from Pawelpksa
Saito SK2 by Pawelpksa


razor, renovation, restauration, shaving

Saito smiles to you

Saito SK1 smiles to you. The smile is deep and extraordinary. Surprising, the shave itself is smooth, easy and “dully” normal. However, yet exciting and more precise in shaving than any other common straights.

I got fascinated with SK1 Saito Kikuboshi razor since the very first time when I saw. It seemed so much not available to me because of the price and unavailability. Along learning about its origin – all that about Japanese barber master Kikuboshi and in general about mastership in crafting Japanese traditional razors – Kamisori, my fascination and believe in its quality was merely increasing.  As far as I know there not many of them in Poland – for sure 2 pieces. YouTube offers some clips made in Japan, Russia, Finland and US. Not many. Both Polish makers of custom razors have made single pieces following this specific design (see the one from Topek and the other from Cichy). Hence, the price reflects both – quality and small number of them offered on the market.

I will be not repeating its history and markings. What  is worth mentioning is that there are 3 profiles of SK : 1, 2 and 3. While SK1 is the extremely curved the SK3 is still smiling deep but not that shocking deep. SK2 is in between of them regarding the profile (read about it here). I hope to present all 3 types in some time. Change in the profile affects the height of the blade which subsequently is reflected in the change of the hollow (see the photo below). SK1 comes with its amazing hollow ground with belly. Additionally I can share that  It was discovered during the renovation that there are extra 1-2-3 markings hidden on the blade under the scales at the pivot. There is a nice website documenting that all.

In this way I was somehow inclined to seek them at origin, in Japan. Thanks to my colleague, whose wife is Japanese, it became much easier to me that thought before. SKs are available there more often than in other places but it is still very rare and limited. In 6 months I discovered 3 SK3, 2 SK1 and 2 SK2. Which does not mean that I wanted to buy all of them. While by rule they are less expensive there, there are still substantially costly. However, nice SK3 can be bought for $70. It happens that they sell whole gear sets from old barber shops and then the price can very attractive But you get it in bulk  with many items that might be out of your interest. The best is to be there on the spot and visit markets and antique boutiques.

Unpacked

All that means that renovation becomes a must. Although I admit that in essence Japanese take care about such things while using, packing standards and fidelity of the description when selling is higher than in Europe. Mine  was renovated by Lewy (drop by to knives.pl forum). As you could see in the other post he did excellent job with my F.Reynolds. No hesitation that he can do such a good job with this one.

In fact he renovated SK1 and SK3 in one shot, the latter was bought by me for the other college – MJW. During that renovations, Lewy discovered the extra hidden markings at pivots and also the fact that both had unsymmetrical pin wholes at the pivot. It was not visible, but as such normally, it is considered as a imprecision, if not a defect. Conclusion might be that we seek perfection in craftship of treser piecem while in essence they were manufactured for daily use. Nowadays traditional shaving comes as extravagance and this is why we look for features which are not essential for use. Saying so, in no means, I depreciate the attractiveness of SKs. The blade is made for “simple” beauty and extreme effectiveness in shaving.

Below SK1 with extra marking, above Cichy custom razor.

Here I can mention that scales of  my SK1 came with beautiful deep green (like bottle glass) cast. I felt lucky and start preparing a set of leathering scuttle and brush handle. Unfortunately, green turned to deep glossy black during the renovation. Most likely the scales are made of a material which ages (probably oxidizes in sun light) with changing its color. You can see other pieces on the market with brownish scales. Probably that is the same effect. My SK3 scales are of different ferry tail.

Lewy made an excellent job. No signs of use or post rust craters. It surface is smooth and elegant. See the photo below, it turns as a mirror.

Newspaper which came with the razor.

I cannot say much about the steel used for Kikuboshi razors. If you read it and you can contribute please post comments, maybe some links regarding the steel used. In the other pieces I can see the engraved note “Swedish steel”.

Honned but not stropped yet

When it comes to shaving I have to say that I was ready to admit in advance that SK1 might be more museum  exhibit while  SK3 is designed for use. How the hell to shave with such a sickle! I was wrong, fortunately fully wrong! First of all it is much smaller than the impression learned from photos. In fact it is tiny piece. It became so appealing to me in context of different razor. I used to strop my Filarmonika 14 with no specific impressions. But then, just after stroping SK1, the usual Filarmonika turned to be giant. 

Surprisingly, shaving came “dully” normal. No need for any specific technique or directions. Not at all. 2 runs, as usual, where fully sufficient. The same routine. I expected SK1 to be typical loud razor. Surprisingly the echo given by it is not that loud as from other full hollow 8/8. I suppose that the blade profile itself and the belly stabilizes it very effectively.  

The deep curve, enables additional natural move of the wrist which is not possible in straights. It is subtle and tiny, but it helps. I can say that due to that additional gesture, shaving seems to be more precise.

Does shaving take more time? Compering to common system safety razors – no doubts – much more. I consider traditional shaving as extravagance by definition. So there is no surprise. So why to do so? Myself I can say that I gain a kind of allergia to many mainstream behaviors and daily routines. But that is different story, subject itself. When comparing shaving time of SK1 and Filarmonika – there is no obvious difference in favor of the first or the latter.

The only thing that I found cumbersome is the bloody scales, precisely its position when stropping. Stopping the smile is a bit different from other straights. An extra dimension in the move is needed. It is not difficult but requires a bit more attention. The protruding handles do not help in this operation.

I consider it still “new” and fresh. Currently it is being used for daily shaving.

Please share your opinions and resources.

razor, renovation, shaving

Sheffield razor from Frederic Reynolds

My favorite size for razor is 7/8 and I like very much smiling blades (you know what I mean). I looked for something affordable at this category. Finally, I discoved the following Sheffield razor from F.R. Reynolds.

It came to me in the condition visible in the following picture. Some rust on the blade and splitting layers in the  scales. Despite that, this is a piece of steel. Therefore renovation was not an issue, not a risk to the blade itself.

I managed to learn its history. Produced in UK before IIWW, bought by US young soldiers sent to French front and then brought back to US. Sold to me by the son of the one who take it from Europe when coming back.

I made the design of scales and selected kirinite lava flow for it. Quite brave but I wanted something sticking out, yet classic. At the beginning there was an idea to add additional red thin layer under the scales, but fortunately it was dropped.

The perfect renovation was done by Lewy. See the results below.